Below will be a sample of video tutorial on "How to Setup a POP3 Email Account in Mozilla Thunderbird"
using NON SSL setup.
For SSL setup you may just replace the "serverhostname" and "SSL ports" based from below steps.
Step by Step Guidance
1. Open your Mozilla Thunderbird.
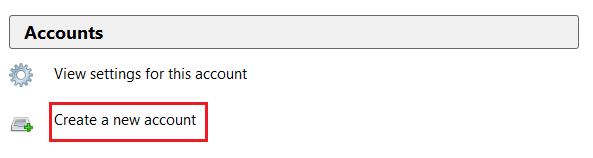
2. Go to Tools > Account Settings.
3. Click Create a new account.
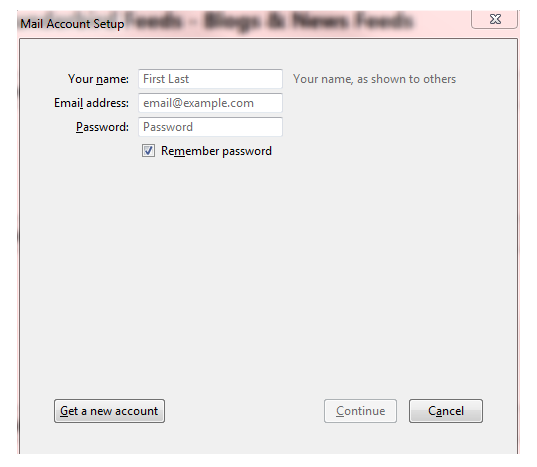
4. Choose Skip this an use my existing email.
5. Enter Your name, full Email address and Password , click Continue.
6. At Mail account setup configure screen,choose Manual config.

7. Select the type of incoming server : POP3
Enter the name of your Incoming and Outgoing mail server as follow:
NON-SSL
Incoming mail server POP: mail.domain.com
Outgoing mail server SMTP : mail.domain.com
(replace your OWN domain name for domain)
SSL
Incoming mail server POP: serverhostname
Outgoing mail server SMTP : serverhostname
(serverhostname refers to the name of the server that is hosting your email
serverhostname can be found from your web hosting control panel server information section )
For Ports:
NON-SSL
Incoming POP : 110
Outgoing for POP : 587
SSL
Incoming POP : 995
Outgoing for POP : 465
(If SSL is choosen, click SSL/TLS under SSL option. Otherwise, select None.)
8. The username would be your full email address such as username@yourdomain.com

9. Click on Re-test the configuration and Click Done.
10. Back to your Thunderbird main menu and go to Outgoing Server and confirm your Outgoing SMTP server.
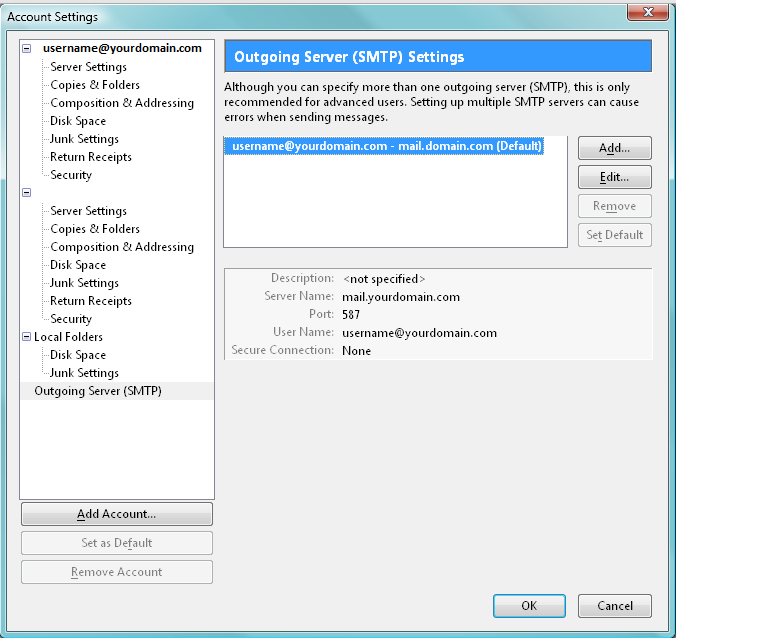
11. Check the Use name and password box and assign your email account to the User Name.
Select No for Use secure connection.
12. You may start using Thunderbird by clicking on the top left Get Mail button.