Note: Technical contact/Administrative contact must register their mobile number to proceed on modify name server as it requires 2FA (Second Factor Authentication). Refer HERE for more info.
1. Go to MYNIC Selfcare portal HERE
2. Enter your login details and click “Login”.
Note: If you have lost your Username or Password, please click on the "Forget Username" and "Forget Password" link to retrieve.
.my DOMAIN REGISTRY (MYNIC): Retrieving Username for .MY Domain
.my DOMAIN REGISTRY (MYNIC): Retrieving Password for .MY Domain
3. Modify name server module is to either to add, change and/or delete name server with the condition below:
Change name server – to change to new name servers information
Add name server – allowed to six(6) name servers only
Delete name server – allow if the total existing name servers more than two(2).
Note: If the domain name and name server domain name is identical, IPv4 / IPv6 information is required.
4. Enter your domain name in the "Search" column, and click on "Manage" for your selected domain. Click Nameserver menu to modify name servers.

5. Modify name server module under Technical Contact account.
5 (a). Change name server
Step 1: Select the name server that you wish to change by click on pencil icon.
Step 2: Enter your new name server in the field given and click NEXT button to proceed.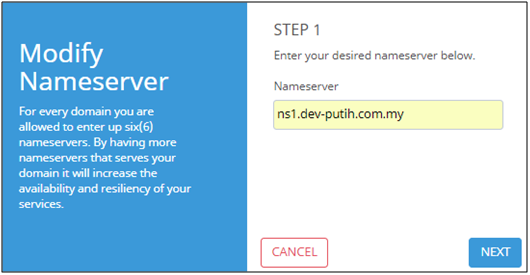
Step 3: Confirmation page to change name server displayed. Click ADD button to confirm.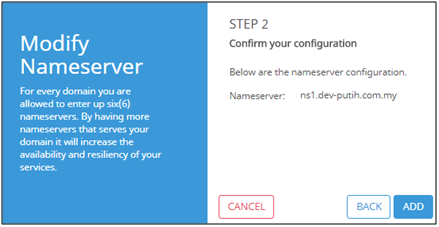
*Note: If new name server entered is identical with the domain name, IPv4 / IPv6 field below will be available and IPv4 is mandatory to be filled-in.
Example of identical name server:
Domain name – dev-cchosting.com.my. Name server – ns1. dev-cchosting.com.my
Step 4: Message ‘The nameserver was successfully updated’ willl pop up.

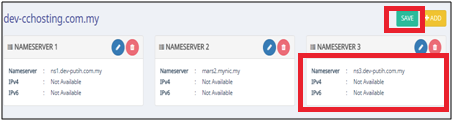
Step 5: New name server which has been changed is displayed at dashboard. Click SAVE button to complete the process.

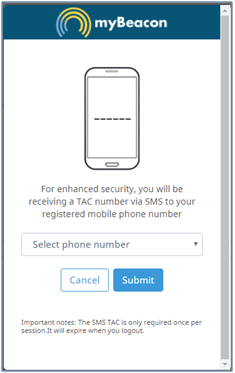
Step 6: A TAC form will be pop up. Select the registered mobile number to receive a TAC number via SMS.
*Note:
- a) The SMS TAC is only required once per session. It will expire when logout.

Step 7: You will receive a TAC via SMS from MYNIC. Enter the TAC number and click the CONTINUE button.

Step 8: A pop up message ‘The details was successfully updated’ will be received.
Step 9: An email notification will be sent to your email. You may also view the new name server at MYNIC Whois.
Note: Your domain name will be propagated with new name server in the next hour of modification.
5 (b). Add name server
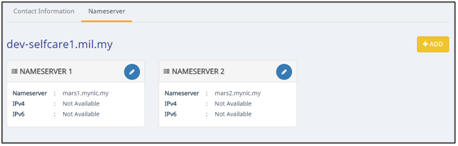
Step 1: Click Add button at right side.
Step 2: Enter new name server in the field given and click the NEXT button to proceed.
Step 3: Click the ADD button to confirm on the changes
Example of identical name server:
Domain name – dev-cchosting.com.my. Name server – ns1. dev-cchosting.com.my
Step 4: New name server which has been changed is displayed at dashboard. Click the SAVE button to complete the process.
Step 5: A TAC form will be pop up. Select the registered mobile number to receive a TAC number via SMS.
Important Notes:
- a) The SMS TAC is only required once per session. It will expire when logout.
Step 6: You will receive a TAC via SMS from MYNIC. Enter the TAC number and click the CONTINUE button.

Step 7: A pop up message ‘The details was successfully updated’ will be received.
Step 8: An email notification will be sent to your email. You may also view the new name server at MYNIC Whois.
Note: Your domain name will be propagated with new name server in the next hour of modification.
5 (c). Delete name server
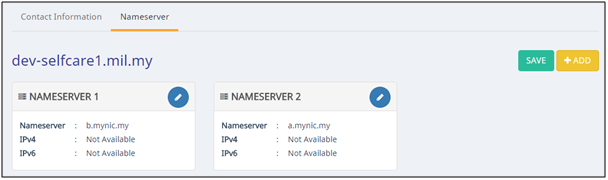
The delete icon is available for name server record with more than two (2) name servers.
Step 1: Select the name server that you wish to delete by click on delete icon.
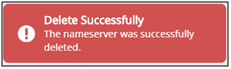
Step 2: Message ‘The nameserver was successfully deleted’ is pop up. Updated name server record displayed at dashboard. Click save button to complete the process.
Step 3: A TAC form will be pop up. Follow the same step at 5b section from Step 5 onwards.
Note: You do agree with MYNIC Policy & Procedure HERE.